And so today I found this really cool feature in Azure Key Vault… We know by now what the Key Vault is, and what it’s capable of. But when developing an ASP.NET Core Web App, I found the solution not optimal. You can either sort of inject your secrets in the system like so:
var azureServiceTokenProvider = new AzureServiceTokenProvider();

var keyVaultClient = new KeyVaultClient(
                        new KeyVaultClient.AuthenticationCallback(
                        azureServiceTokenProvider.KeyVaultTokenCallback));

config.AddAzureKeyVault(
        $"https://{yourvaultname}.vault.azure.net/",
        keyVaultClient,
        new DefaultKeyVaultSecretManager());
But this is way from optimal in your development environment. Also, the API calls hide the config keys in the code, meaning that changes would require development and re-deployment of the system.
A second approach, fairly nice, is to use ARM templates. This means that app settings will be created during deployment of the template. The values contain the values of the secrets. This way, keys are easily changed, however it’s a bit confusing when values do change. In fact,the best way is to redeploy the ARM template when values change.
Personally I really like Visual Studio’s approach to have appsettings.json in your project so the file structure is obvious. And because you there are User Secrets, you don’t have to add sensitive data into the appsettings.json file. Just right-click the solution and choose ‘Manage User Secrets’. Values in the secrets.json file override values in the appsettings.json file.
But now the Key Vault… I think the configuration settings of an Azure Web App are ideal to add / overwrite configuration. Just click your Web App in the Azure Portal, and go to the configuration blade. You can add values here and allow them to overwrite values in appsettings.json as well. Problem is, that secrets entered here, are no secret anymore. Time for a change.
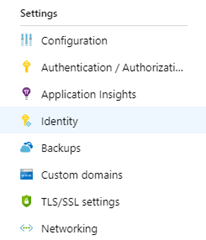
 I created a new resource group on Azure, and added a Key Vault and a Web App. Please note it’s not mandatory to have everything in the same resource group. Now we need to tell the Key Vault, that the web app is allowed to access our secrets. In order to do so, the Web App must become an identity so we can reference it. Click on your web app, so you can access it’s properties and look for the Identity settings. Once selected you can switch the toggle to On, click save and then confirm your action.
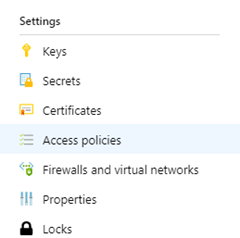
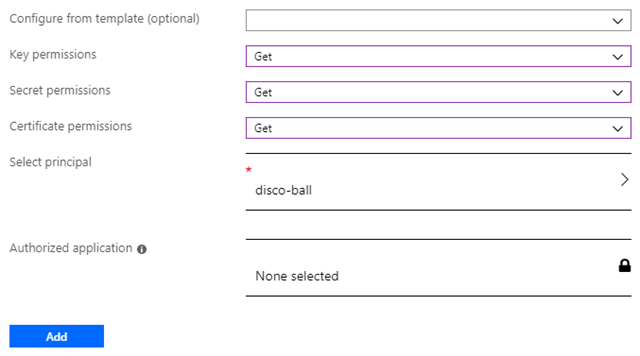
 Then go to your Key Vault and find the Access Policies tab. Here you click ‘Add access policy’. A new blade opens that allows you to select users and apps and grant permissions to them. Because I created an identity out of the Web App (I named my web app disco-ball) I’m able to select it at the ‘select principal’ field. I leave the template field alone, I decided to only set individual permissions. My disco-ball app can only get keys, secrets and certificates. Nothing more. The settings blade for your access policy should look something similar like mine..

Click the Add button to return to the list of access policies and don’t forget to hit the save button there. I always forget the save button and then wonder why nothing works…
What we did here, was grant access to the Key Vault, for the disco-ball web app. But it is only capable of reading keys, permissions and certificates. And now on to why I think this is such a nice solution. Let’s make a secret, for example a connection string to a storage account. Go to your Key Vault, open the Secrets blade and click Generate/Import. Enter a name for your secret, let’s say StorageConnectionString and the value (I’m not going to post one here, because it’s secret obviously). Click the Create button and you will return to your list of secrets.
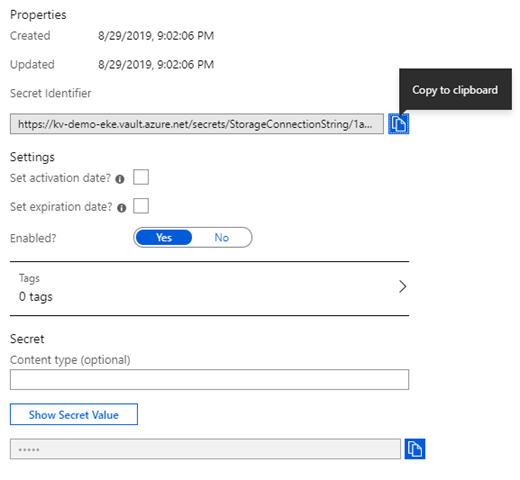
 Surprise, your first secret is there. Now to read this secret from your web app, you click on the secret and open this specific version of the secret you want to use. If this is a new secret, only one version will be available. If you change the values over time, new versions will be created. Now when you opened the version you want, you see the details and more important, the ‘Secret identifier’. Click the ‘Copy to clipboard’ icon just after the ‘Secret identifier’ field.
Now we head back to your Web App and open the configuration blade. This configuration blade can be used to override app settings of your Web App. If you’re not familiar with this technique you may want to read the documentation first.
Anyway, create a new application setting and name if similar to the setting in your appsettings.json. And for the value, you enter drum rolls…….
@Microsoft.KeyVault(SecretUri=<secret-identifier-here>)
And that’s the trick! Your setting value is now changed with the value of your secret. Personally I think this is a really nice solution because you don’t have to setup a Key Vault Client or change anything in your ‘regular development flow’, you can even use the appsettings.json and secrets.json in your local development environment without any problems, a clean, fast and neat solution. Let me know what you think in the comments below!
Last modified on 2019-08-29

