To me, DAPR is a term that emerged a couple of years ago and just sat there for an undetermined amount of time. And then came Azure Container Apps. With this post, I want to make clear what DAPR is and how you can take advantage of it, but now in human language so that each and everyone with a little bit of programming skills understands. I have a colleague Florian van Dillen who refers to DAPR as being your butler. Hey, I want this… And DAPR does exactly that for you. But there is more…
Prerequisites
DAPR relies heavily on container technology so if you want to try DAPR, or follow along with this document, make sure you have docker installed and updated to the most recent version. Also, I will show some demos in C#. This post is not exactly a walkthrough, but there are some steps that you can follow to get DAPR up and running and write your first implementations.
The development environment
Personally, I think one of the strongest advantages of DAPR is that it doesn’t only work somewhere where the magic happens in the cloud, but also on your local machine. To get DAPR up and running, you must first install DAPR on your machine. Follow the instructions on this page, and you’re good to go.
Once you have installed the DAPR CLI, you can use this CLI to initialize DAPR on your machine. By initializing DAPR, it will run a Redis, Zipkin, and placement container. When you open Docker Desktop, you can see the following containers are up and running:
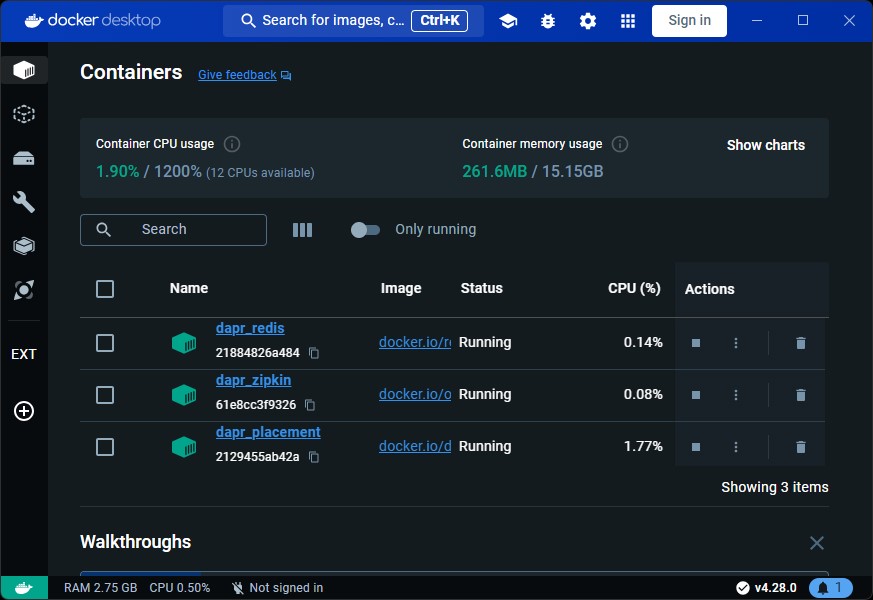
Not only did it run this container, but the initialization also created some default components like the state store and pub-sub. To initialize DAPR, open an elevated terminal and type dapr init. Note, that when you installed the DAPR CLI, you must restart the terminal before the dapr command will work properly. Once the init is done, you can type docker ps to see the running containers or view them in Docker Desktop like the image above.
The sidecar
DAPR runs as a sidecar alongside your application. On your local machine (in self-hosted mode) this means it is a process running on its own, on your local machine. You use the DAPR client to take advantage of DAPR Components. When your application starts, you can configure a DAPR client that is then to be injected using Dependency Injection.
Components
DAPR comes with a couple of components that you can take advantage of. The biggest advantage of using DAPR is that you only have to know about the existence of the DAPR Client. For example, when you want to implement a state store (for storage, or caching purposes), you will use the DAPR State Store. DAPR in turn, is configured to use one of the supported underlying storage mechanisms (like Azure CosmosDB, Redis, Firebase) and some more to actually store your data. In theory, this allows you to change the underlying storage of your state store, without having to change a single line of code. Now, to be honest, I don’t really see a use case there, because how often are you going to switch between underlying storage mechanisms? But!! This also allows you to, just by changing the configuration, run your system, or all your systems, localhost and still have the same runtime experience.
And this is true for most of the DAPR components. You can use the DAPR component by just calling a function on the DAPR Client, and configure the corresponding DAPR component to use one of the supported underlying technologies. The magic between differences in implementations of the underlying technologies is the responsibility of DAPR and that concern is taken away from you.
Supported DAPR Components
If you want to take advantage of DAPR, the following components are available for you (by the time this article is published):
- State Stores - is used to store application state. Supported underlying technologies are AWS DynamoDB, Azure CosmosDB, Firebase, Redis, and Cassandra.
- Pub/Sub Brokers - are used for messaging and a good mechanism to offload long-running operations to separate processes, or support event-driven architectures for example. The supported underlying technologies are AWS SQS, Azure Service Bus, GCP Pub/Sub, Redis, and RabbitMQ.
- Bindings & Triggers - allows external resources to trigger a method on an application or be called from an application as part of the bindings. Supported underlying technologies are AWS S3, Azure Storage, GCP Storage, Twilio, and Kafka
- Secret Stores - These are typically used to access secrets like passwords or API Keys from secure secret stores, like AWS Secrets Manager, Azure Key Vault, GCP Secrets Manager, HashiCorp Vault, and Kubernetes Secrets.
- Observability - is to observe your application’s health and performance and collect telemetry of your application. You can leverage Prometheus, Application Insights, Zipkin, and Jaeger.
- Configuration - to centralize your configuration store and read configuration from this central store. You can use Redis, PostgreSQL, and Azure App Configuration.
- Distributed Lock - to ensure only one process has access to a certain procedure in code at a time. You can use Redis as an underlying store.
- Workflow - is not in GA just yet, but allows you to create long-running processes and workflows.
- Cryptography - used to implement encryption and decryption strategies using JWKS, Azure Key Vault, Kubernetes Secrets or Local Storage.
Let’s get going
So now you have DAPR installed, and hopefully understand and see the benefits of using DAPR. Now let’s get going and implement some code. The is a little bit here, especially when running .NET applications. When debugging your application, you must first start the DAPR sidecar, and then DAPR will start your application. Now for you to be able to debug, you must now attach your debugger to that process. This is not the best debugging experience as most of us just want to F5.
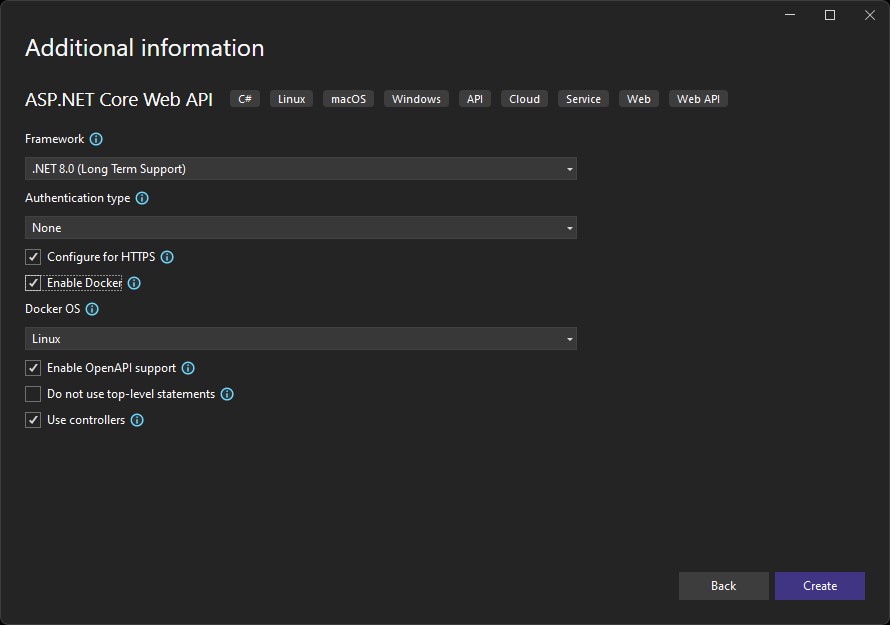
Let’s create an API in .NET. Just create a new API and use the ‘ASP.NET Core Web API’ template. Name the Application you want, and in the following wizard step, make sure Enable Docker is checked.
Now hit Create and let the template generate your API. When done, go and add a NuGet Package called Dapr.Client
Now create a new controller. In the New Controller dialog box choose API Controller - Empty and name it DaprController. I changed the code of the controller so it looks like so:
using Dapr.Client;
using Microsoft.AspNetCore.Mvc;

namespace AnyApp.Controllers;

[Route("api/[controller]")]
[ApiController]
public class DaprController : ControllerBase
{
    public record StateStoreObject(DateTimeOffset CreationDate);

    private const string StateStoreName = "statestore";
    private const string CacheKeyName = "cache-key";

    [HttpGet]
    public async Task<IActionResult> Get(CancellationToken cancellationToken)
    {
        var daprClient = new DaprClientBuilder().Build();
        await daprClient.WaitForSidecarAsync(cancellationToken);
        var fromStore = await daprClient.GetStateEntryAsync<StateStoreObject>(
            StateStoreName,
            CacheKeyName,
            cancellationToken: cancellationToken);

        var stateStoreObjectInstance = fromStore.Value ?? new StateStoreObject(DateTimeOffset.UtcNow);

        if (fromStore.Value == null)
        {
            await daprClient.SaveStateAsync(
                StateStoreName,
                CacheKeyName,
                stateStoreObjectInstance,
                cancellationToken: cancellationToken);
        }
        return Ok(stateStoreObjectInstance);
    }
}
Let’s run through to code. First, I create a record that allows me to pass a DateTimeOffset of when that record was created. Then I created a get endpoint that creates a new DAPR Client and waits for the sidecar to be available. It then fetches the StateStoreObject from the state store (note, there is no value in the state store when it runs for the first time). When the value is not retrieved successfully, it creates a new instance of the StateStoreObject object with the current date and time, and stores that in the state store. Then the StateStoreObject is returned as JSON.
So what will happen if we run this, is that the first run will create a new instance of the StateStoreObject record. It will store that record in the state store and return it. Now every subsequent request will actually get a value returned from the state store, and this returns the date and time the object was initially created. This shows, that the object is stored somewhere in a magic place by DAPR.
Run the application
Now if you run the application and invoke the endpoint with Swagger, you will see that it fails and keeps on waiting for the sidecar to be available. The StateStoreObject will never be returned. This is because the sidecar for this application is not started. To do so, you must open a new terminal, navigate to your API project, and type the following command:
dapr run --app-id yourapp --app-port <port> -- dotnet run -p <YourCsProjectFile>.csproj --urls http://localhost:<port>
Obviously, replace the <port> and the <YourCsProjectFile> with an actual desired port number and the actual name of your CSharp project filename. Now when you run this command, you will see that DAPR starts the sidecar, and runs your daprized app in it. If you navigate to http://localhost:<port>/swagger, you will see your app up and running, and be able to invoke the endpoint and see the expected results when invoking the endpoint over and over again.
But…
At this time, your debugger is not attached. Although I usually write no bugs at all, it is sometimes useful to have a debugger attached just to see what happens. Now you can attach your debugger to the running process and debug from there, but from a developer perspective, this is far from ideal. Having to change your code and then run that complicated command over and over again is just not going to fly.
DAPR SideKick for .NET
SideKick is a NuGet package that you can install, that will provide lifetime management of your DAPRized application, and will make running and especially debugging your application localhost, frictionless (as they call it themselves).
To get this up and running, I made some changes to the project as we have it so far. I removed the Dapr.Client NuGet library reference and added a new NuGet packages dependency Dapr.AspNetCore. I also added a dependency on Man.Dapr.Sidekick.AspNetCore.
The first package is to be able to inject the DaprClient using dependency injection. Then I changed my Program.cs and added the following lines:
builder.Services.AddDaprSidekick(config =>
{
    config.Sidecar = new DaprSidecarOptions()
    {
        AppId = "anyapp"
    };
});
builder.Services.AddDaprClient();
I added the lines right after builder.Services.AddControllers(). Configuring your app this way allows Sidekick to start the sidecar, and run your app for you in one go. And this allows you to run your app from within Visual Studio, by just hitting F5, and you will have the debugger attached.
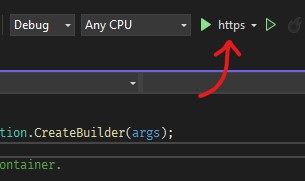
Note that a common mistake here is that people often want to run the app with the (Docker) Container startup profile. However, the container cannot access the daprd executable required to run your app. Just switch to the http or https profile like in the image, and run your app. Now, you will see that when starting your app from VS, or your favorite IDE, the app starts, behaves like expected, and has a debugger attached.
And now to the cloud
So now your app runs smoothly on your local host. Now you want to bring it to the cloud. The reason that your app runs succesfully local host, is that the state store container is already installed for you during the dapr init, and there is a default component configured for the DAPR State Store, with the name statestore.
Now when you build a container image of your app and publish that to a container registry you can read more about this process here, you can run the app in your Azure Container Apps Environment.
The only thing that you need to do, is navigate to your Azure Container Apps Environment and find the DAPR Components blade. Here, your add a new DAPR component for a state store.
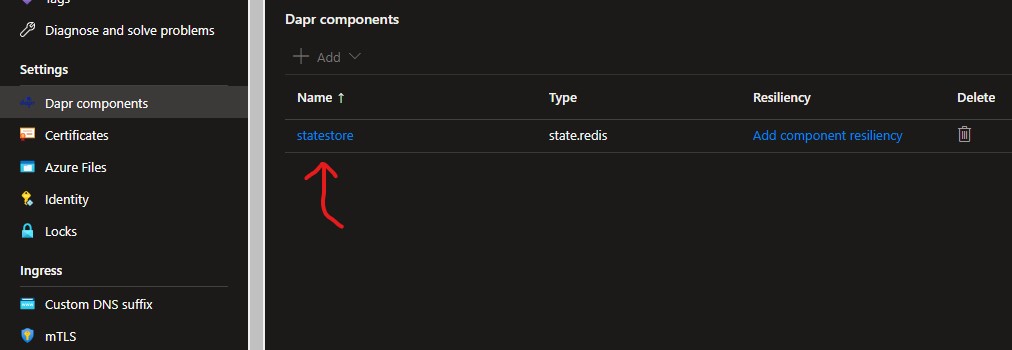
In the example of the image above, I configured a state store with Azure Cache for Redis as an underlying storage mechanism. Also note, that you can configure multiple of the same component types. So, multiple state stores, multiple pub/sub components etc. You refer the a specific state store by its name. So back to the beginning of the post, look at the snippet of C# code and note that getting value from, and storing values in the state store references a state store with the name statestore. This is because the state store on my local development machine is called statestore, but then I should also name the statestore in my cloud environment the same.
Last modified on 2024-03-26